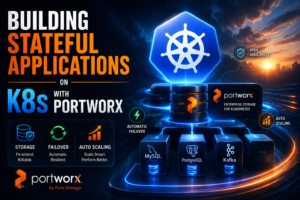
In Building Stateful App on K8s with Portworx: Storage, Failover, and Auto Scaling (Link) post, we built a highly available storage layer for a stateful MySQL database. We demonstrated how Portworx handles:
- Synchronous 3-way Volume Replication (
repl: 3) using the defaultpx-csi-dbStorageClass. - Instant Failover: Rescheduling
mysql-0within seconds whenworker-01experienced a hard node crash without losing a single transaction. - Automated Volume Expansion: Leveraging Portworx Autopilot to dynamically scale persistent storage online without restarting application pods.
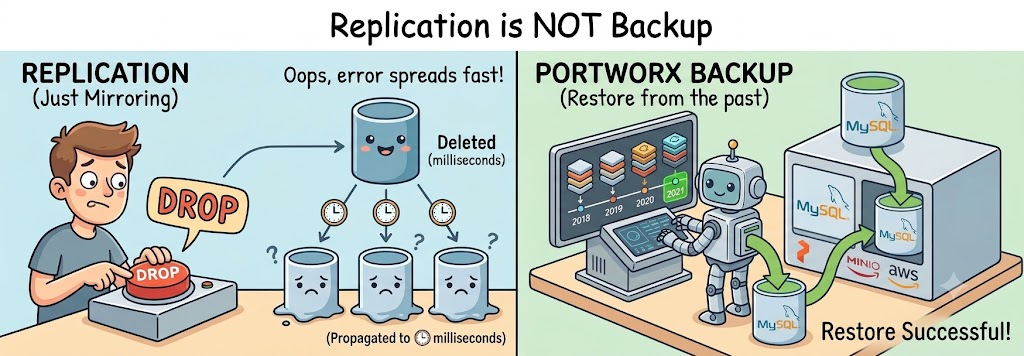
However, a fundamental architectural truth remains: Replication is not Backup.
- Replication protects against hardware and infrastructure failures (node crashes, disk failures, network partitions).
- Backup protects against human error, logical corruption, ransomware, and site-wide disasters.
If a developer accidentally executes DROP DATABASE production_db;, Portworx will faithfully mirror that deletion across all three replicas in milliseconds. To recover from logical disasters, we need a true Application-Aware Data Protection solution: Portworx Backup.
If a developer accidentally executes DROP DATABASE production_db;, Portworx will faithfully mirror that deletion across all three replicas in milliseconds. To recover from logical disasters, we need a true Application-Aware Data Protection solution: Portworx Backup.
Section I: Portworx Backup Architecture & Key Concepts
Portworx Backup provides Kubernetes-native data protection by backing up not just raw storage volumes, but the entire application state—including Kubernetes manifests (StatefulSet, Service, ConfigMap, Secret) and persistent data.
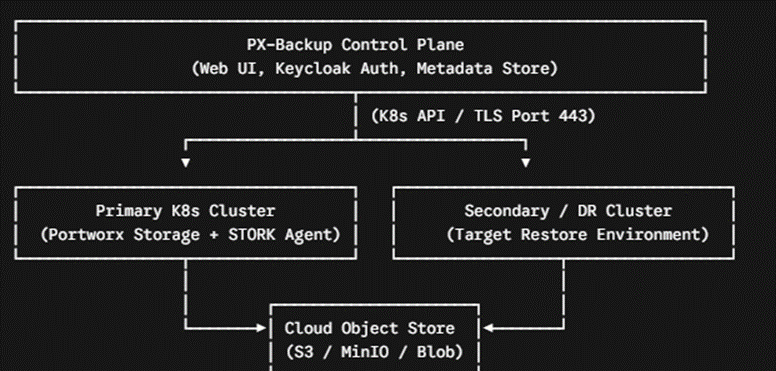
Core Architecture Components
- PX-Backup Control Plane: The central management UI and API engine used to define schedules, backup locations, and RBAC policies.
- STORK (Storage Orchestrator for Kubernetes): Act as an in-cluster agent. STORK quiesces applications, captures volume snapshots, and collects Kubernetes YAML manifests.
- KDMP (Kubernetes Data Management Platform): The data movement engine that compresses, encrypts, and transfers snapshot blocks directly to Object Storage (AWS S3, MinIO, Azure Blob).
Section II: Deploying Portworx Backup via Helm
We will deploy Portworx Backup directly onto our Kubernetes cluster. We will reuse the px-csi-db StorageClass established in Part 1 to back the internal persistence layer (Cassandra/Postgres metadata databases) of PX-Backup.
Portworx Backup (PX-Backup) is packaged and deployed using Helm v3. In an On-Premises setup, PX-Backup requires persistent storage for its internal microservices (such as Keycloak authentication, MongoDB/PostgreSQL metadata, and central management dashboards). We will leverage our pre-existing, replicated px-csi-db StorageClass established in Part 1.
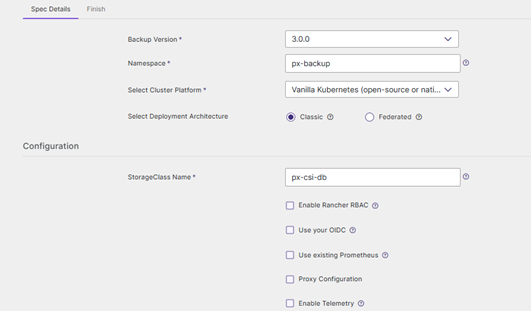
Step 1: Generate the Installation Spec via Portworx Central (SpecGen)
Before running CLI commands, you must construct your deployment specification using Portworx Central SpecGen.
- Navigate to central.portworx.com (or
spec.portworx.com). - Backup version: select the required version of Portworx Backup from the drop-down list
- Select Cluster Platform: select your Kubernetes cluster platform from the drop-down list.
- Configure the spec parameters:
- Storage Configuration: Set StorageClass to
px-csi-db(the 3-way replicated storage class created in Part 1).
- Target Namespace: Specify
px-backup.
- Storage Configuration: Set StorageClass to
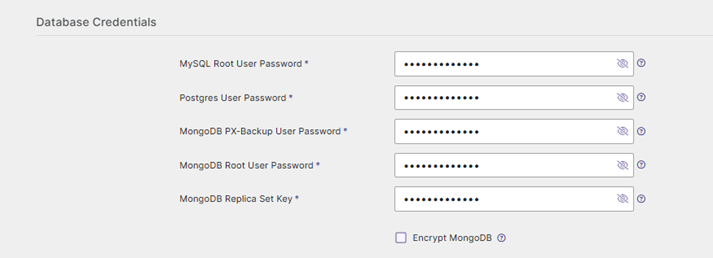
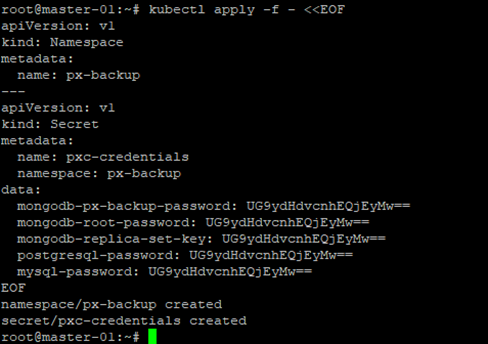
- Database Credentials: This section configures database passwords for the various database components used by Portworx Backup.
During the Portworx Central SpecGen configuration process, you will be prompted to fill out the Database Credentials section. Note that all fields marked with an asterisk (*) are mandatory.
It is a common point of confusion to mistake these fields for your workload databases (such as the application MySQL instance deployed in Part 1). In reality, these credentials initialize the administrative access passwords for PX-Backup’s internal microservices:
- MySQL Root & Postgres User Passwords: Utilized internally by Keycloak and PX-Central management services to handle user authentication, session state, and RBAC policies.
- MongoDB PX-Backup & Root Passwords: Used to secure the internal MongoDB cluster, which serves as the primary metadata engine storing backup schedules, cluster inventories, and S3 location mappings.
- MongoDB Replica Set Key: A shared secret key used to encrypt and secure node-to-node communication across internal MongoDB replicas.
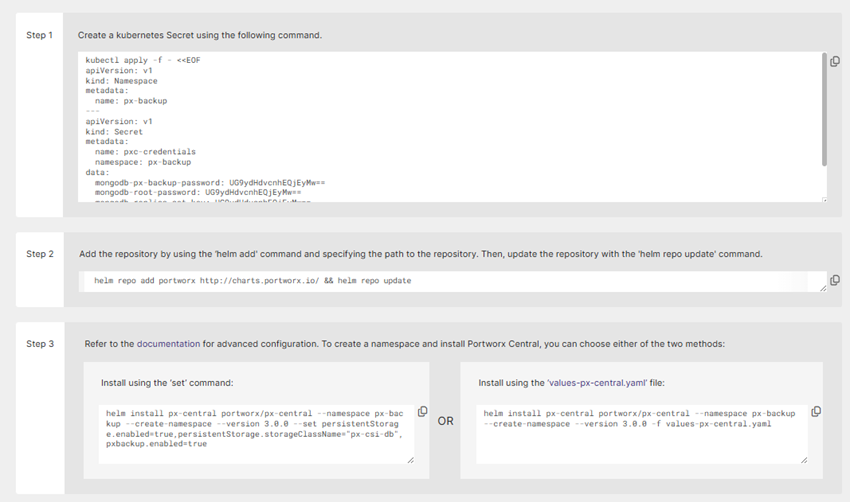
- Click Next to view the Finish tab, which provides the list of commands needed to complete the installation of Portworx Backup in your environment.
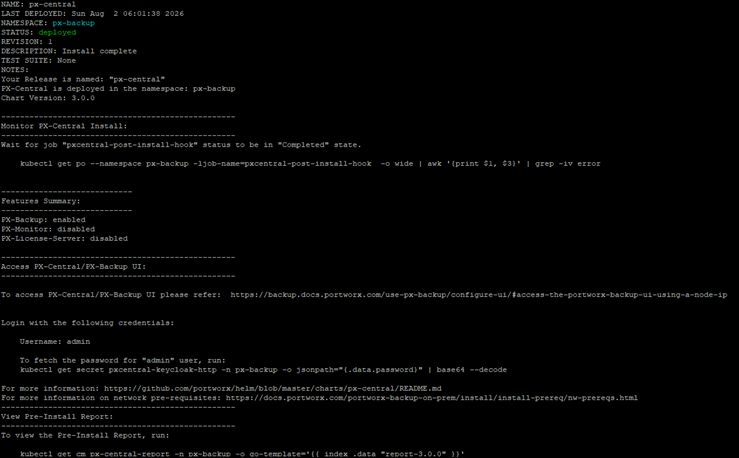
Once SpecGen compiles your configuration, it provides a 3-step deployment workflow on the final screen. Execute these commands on your Kubernetes control plane node (master-01):

Step 2: Monitor the Installation Process
After running the helm install command, the chart executes a Kubernetes post-install hook Job named pxcentral-post-install-hook. This hook is responsible for initializing internal database schemas, configuring Keycloak OIDC authentication, and bootstrapping the application state.
You must monitor this hook to ensure the deployment completes successfully.
1. Track the Post-Install Hook Execution
First, check the status of the post-install hook pod to ensure it is running without errors:
kubectl get pod --namespace px-backup -ljob-name=pxcentral-post-install-hook -o wide | awk '{print $1, $3}' | grep -iv error
Next, monitor the Job status continuously until it finishes:
kubectl get job pxcentral-post-install-hook -n px-backup -w
2. Verify Component Pod Status
Once the post-install hook completes, verify that all Portworx Backup microservices have successfully started and transitioned to the Running state:
kubectl get pods -n px-backup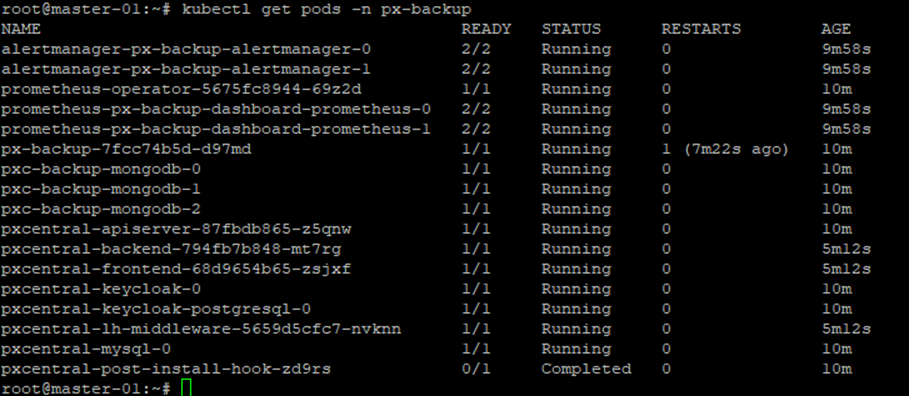
Step 3: Access the Portworx Backup UI via NodePort
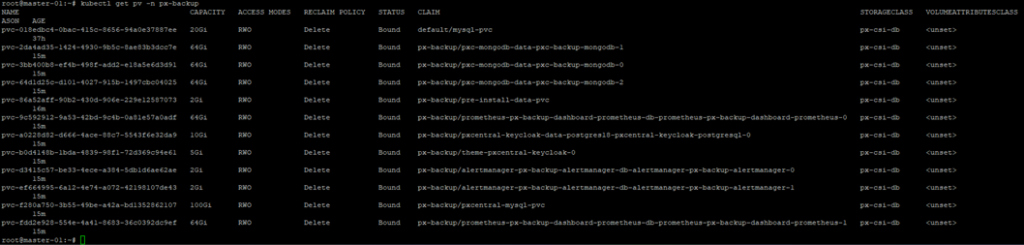
Once all pods and persistent volume claims are in the Running and Bound states, you can access the Portworx Backup dashboard directly using the IP address of any worker node in your cluster.
Find the public/external IP (NODE_IP) of any node in your current Kubernetes cluster.
kubectl get nodes -o wideFind the node port (NODE_PORT) of the px-backup-ui service.
kubectl patch svc px-backup-ui -n px-backup -p '{"spec": {"type": "NodePort"}}'
kubectl get svc px-backup-ui -n px-backup
3. Access the Dashboards
Combine your NODE_IP and NODE_PORT to construct the access URL:
http://NODE_IP:NODE_PORT/auth/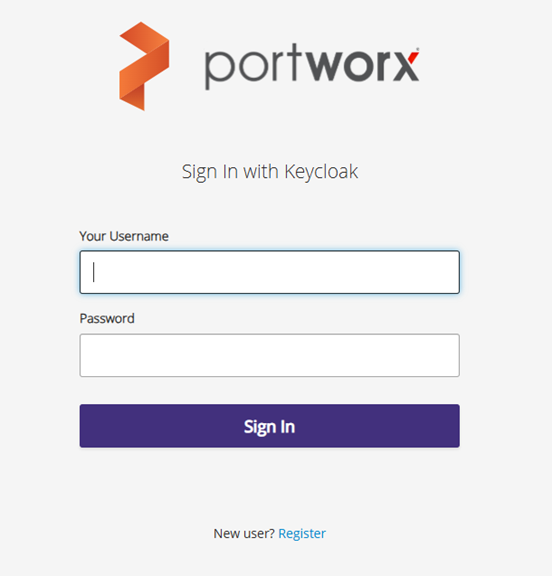
Retrieving Admin Credentials for Initial Sign-In
To log in to the Portworx Backup web console after installation and proceed with the initial configuration, you need to retrieve the default administrator username and password stored in the Kubernetes Keycloak secret.
Run the following commands from your control plane node (master-01) terminal to extract the credentials for admin:
kubectl get secret pxcentral-keycloak-http -n px-backup -o jsonpath="{.data.password}" | base64 --decode && echo
Update the Default Password Upon logging in for the first time, it is strongly recommended to replace the temporary system-generated password with a secure, custom credential:
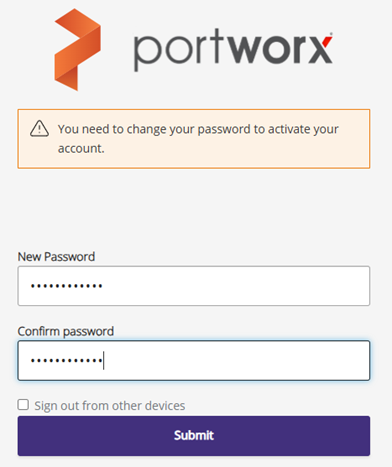
Once your password has been updated, log back in using your new admin credentials. Upon successful authentication, you will land directly on the Portworx Backup Management Console home page, ready to start registering your Kubernetes clusters and configuring data protection policies.
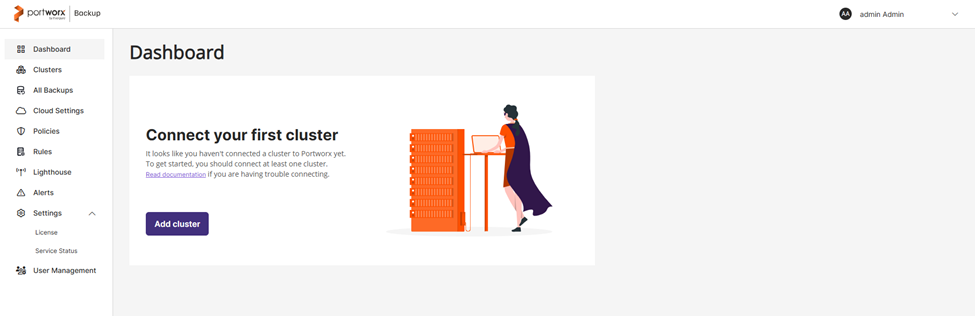
Section III: Registering the Target Kubernetes Cluster in Portworx Backup
To protect stateful workloads like our MySQL database from Part 1, Portworx Backup needs control plane access to the target Kubernetes cluster. This is achieved by registering the cluster using its kubeconfig file and connecting via STORK (Storage Orchestrator for Kubernetes).
Step 1: Prepare Target Cluster Credentials (kubeconfig)
Portworx Backup uses a kubeconfig file with cluster-admin privileges to interact with the target cluster’s Kubernetes API server.
You can use your existing admin configuration located at ~/.kube/config on your control plane node (master-01).
kubectl config view --flatten > target-cluster-kubeconfig.yamlStep 2: Add Cluster in Portworx Backup UI
- Open your browser and log into the Portworx Backup UI (
http://<NODE_IP>:<NODE_PORT>). - On the left menu navigation bar, click Clusters.
- Click the Add Cluster button in the top-right corner.
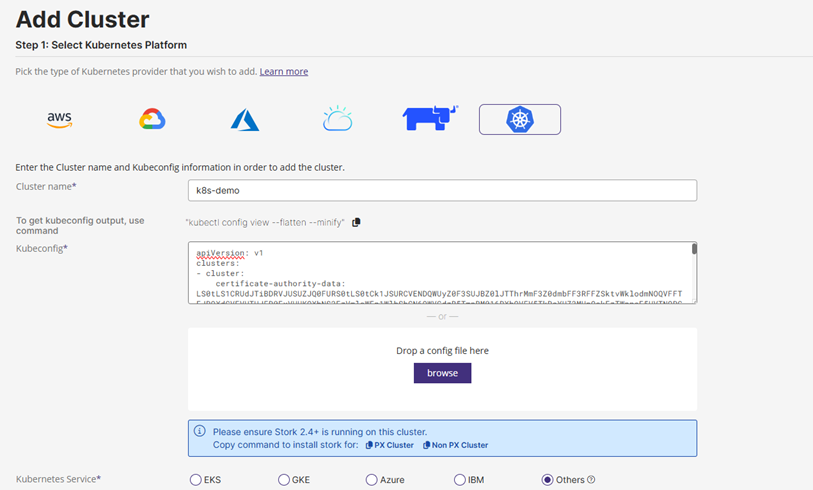
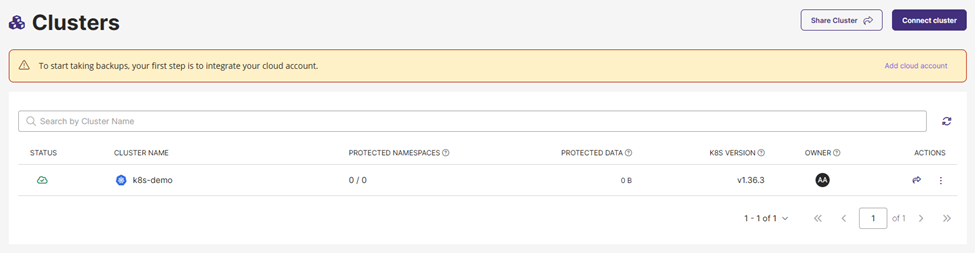
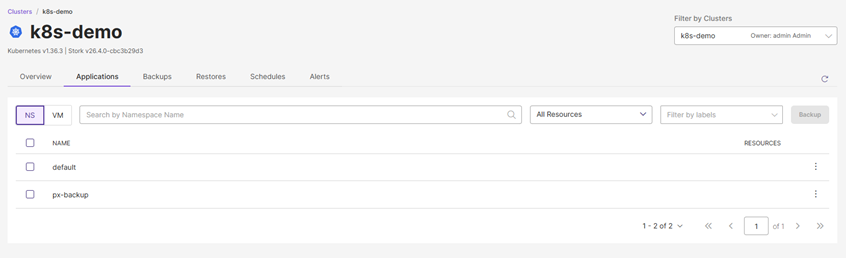
Portworx Backup adds the on-premises cluster. Once the cluster is successfully added, you are automatically redirected to the Cluster page.
Summary of Part 1 Accomplishments
Here is a quick recap of what we covered in this section:
- ℹ️ Portworx Architecture Overview: Explored the key concepts of Portworx Backup and how it manages Kubernetes data protection.
- ⚙️ On-Prem Spec Generation: Tailored a custom deployment manifest using Portworx Central SpecGen, configuring internal database credentials and Keycloak OIDC authentication.
- 📦 Portworx Backup Installation: Deployed the
px-centralpackage via Helm while resolving real-world cluster edge cases, such as bypassing CRD conflicts with--skip-crdsand patching missing OIDC secrets. - 🔐 Monitoring & Access Setup: Tracked the
pxcentral-post-install-hookexecution, retrieved administrative credentials from Keycloak secrets, accessed the Web UI via NodePort, and updated default admin credentials. - 🔌 Target Cluster Onboarding: Added the target Kubernetes cluster into Portworx Backup using
kubeconfigand verified active STORK agent connectivity.
What is Coming in Part 2
Now that your Portworx Backup control plane is fully operational and connected to your target cluster, Part 2 will focus on configuring storage targets, setting up protection policies, and testing real-world disaster recovery:
- 🪣 Configuring S3 Backup Locations: Connecting Portworx Backup to an S3-compatible Object Storage target (such as MinIO or AWS S3) as a secure off-site repository.
- ⚡ Application-Consistent Backup Rules: Creating pre- and post-execution hooks to freeze active database transactions and flush memory to disk, ensuring crash-consistent snapshots.
- 📅 Automated Backup Schedules & Retention: Defining SLA policies for automated daily and weekly backups alongside retention lifecycle rules.
- 💥 Disaster Recovery Demo: Deploying a sample stateful application (MySQL), simulating a real failure by deleting its namespace, followed by a full Point-In-Time Restore (PITR) from PX-Backup to recover the application without data loss.
See you in Part 2! Keep your Part 1 lab cluster running, and we will move directly into configuring backup policies and testing disaster recovery.